Hello, Lykkers! Did you know that a single drink can bring comfort, flavor, and a burst of color all at once?
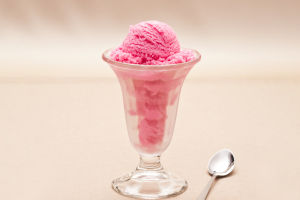
That’s exactly what a taro milkshake does! With its velvety texture and enchanting purple hue, it's a treat that captivates both the eyes and the taste buds.
Curious about how to create this gem in your own kitchen?Come along as we turn taro into a magical blend of creamy delight.
Why Taro?
Before exploring the recipe, let’s shine a spotlight on the star ingredient: taro. Revered across cultures for its subtle sweetness and natural creaminess, taro has been a beloved root vegetable for centuries. Its unique flavor pairs perfectly with milk, making it an ideal base for this milkshake. Each sip of a taro milkshake is like wrapping yourself in a cozy blanket of flavor—comforting and oh-so-satisfying!
Creamy Taro Milk Bubble Tea | Brown Sugar Boba & Real Taro Root
Video by Thank You Berry Much
Ingredients: The Building Blocks of Deliciousness
Creating the perfect taro milkshake starts with selecting the finest ingredients. Here's what's needed to craft this colorful delight:
1 cup of fresh taro root (peeled and cubed)
2 tablespoons of sugar or a natural sweetener of choice
1 cup of milk or plant-based alternatives like almond or oat milk for a lighter option
1/4 cup of condensed milk for an extra touch of creaminess
1 cup of ice cubes
A dash of vanilla extract (optional, for added aroma)
Now, onto the magic! With these ingredients on hand, it's time to transform them into a gorgeous, purple-hued masterpiece.
Step-by-Step: From Root to Smoothie Perfection
Cook the Taro
Start by boiling the taro cubes until they're soft and tender, which usually takes around 15 minutes. Once cooked, drain and let the taro cool to room temperature. This step is crucial as it softens the taro, making it blend smoothly with the other ingredients.
Blend to Create the Base
In a blender, combine the cooled taro, sugar, milk, and condensed milk. Blend on high speed until the mixture is smooth and velvety. If a more robust flavor is desired, add a few drops of vanilla extract.
Add Ice for a Frosty Finish
Drop in the ice cubes and blend again until the mixture becomes thick and frosty. The key here is to strike a balance—blend just enough to crush the ice but not too much to dilute the drink.
Serve and Enjoy
Pour the taro milkshake into a tall glass, and for an extra pop of color, sprinkle some crushed taro flakes or a swirl of condensed milk on top. The presentation is almost too pretty to drink—almost!
Taro Milkshake: A Treat for the Senses
A sip of this taro milkshake is like a journey through layers of subtle sweetness and creamy textures, with each element complementing the other. The natural earthiness of the taro contrasts beautifully with the rich milk and ice, creating a drink that’s refreshingly indulgent.
For those who want to elevate the experience, try pairing the milkshake with some chewy tapioca pearls or a spoonful of whipped cream. It's a versatile treat that can be customized to match any preference or occasion.
A Toast to Flavorful Creations!
Lykkers, if a craving for something smooth and luxurious comes knocking, remember this recipe. A taro milkshake isn't just about mixing ingredients—it's a delicious creation that brings pure joy with every sip. So, pull out that blender, embrace the vibrant purple goodness, and savor the flavors that make each glass a memorable treat. May every milkshake moment be filled with laughter, color, and a sense of delightful discovery! Cheers to exploring more flavorful adventures, one taro milkshake at a time!